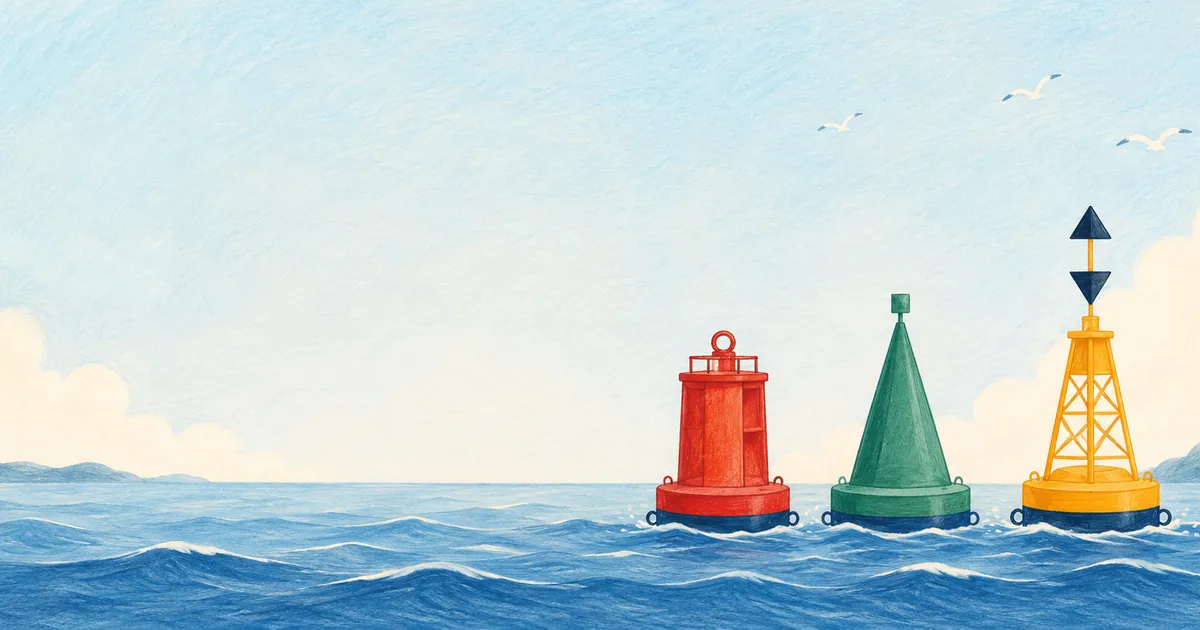
Buoys are the “road signs” of the sea, using shape, colour and topmark to tell you which side is safe to pass and where the danger lies. The buoyage questions on the PVO Grade 2 written exam are actually very systematic: once you remember that Hong Kong is in IALA Region A and learn what each of the five buoy types looks like, you can score them reliably. This guide starts with lateral marks — the most frequently tested — and works through cardinal marks, isolated danger marks, safe water marks and special marks. If you want to practise image questions as you read, pair this with the “10-Minute PVO Boat Licence” app: its 903 questions cover both Part A and Part B, the image questions on buoyage and lights come with diagrams and detailed explanations, wrong answers go straight into wrong-answer review, and it is ad-free and free to download.
First things first: Hong Kong is Region A
The International Association of Marine Aids to Navigation and Lighthouse Authorities (IALA) divides the world into two buoyage regions: Region A and Region B. The two regions have the lateral-mark colours reversed left-to-right, so if you get the region wrong, every answer flips. Hong Kong uses the Region A system. In Region A, taking the direction of entering harbour (from sea into port) as the reference, the port-hand lateral mark is red and the starboard-hand lateral mark is green — the familiar “red to port, green to starboard”, consistent with the logic of a vessel’s sidelights. Compress “Hong Kong = Region A = red to port, green to starboard” into a single line and you have laid the foundation for every buoyage question.
Strictly speaking, the port and starboard sides of a lateral mark follow the “conventional direction of buoyage”, which is set by the direction of the main flood stream. In Victoria Harbour the flood tide runs from east to west, so entering from the east is the conventional (upstream) direction. This local fact is the hidden trap in buoyage questions: the moment you head seaward from an inner bay you are going against the conventional direction, and although the buoy colours stay the same, the side on which you pass them is reversed — a red can buoy must now be passed on your starboard side and a green conical buoy on your port side. Extend the mnemonic to “conventional direction: red to port, green to starboard; against it, swap the sides”, and you can handle the examiners’ favourite trap — “leaving Pak Sha Wan seaward with a red can buoy dead ahead, which side do you pass it?” (answer: starboard).
Lateral marks: red can to port, green cone to starboard
Lateral marks are used to mark the port and starboard boundaries of a channel and are the most commonly tested type. In Region A: the port-hand lateral mark is red, usually a can buoy (flat-topped like a tin); the starboard-hand lateral mark is green, usually a conical buoy (pointed at the top like a cone). Besides colour and shape, the topmark matches too: a red can carries a red can-shaped topmark, and a green cone carries a green conical topmark. Three features corroborate one another, so even if an image is blurry you can deduce the mark from any one of them.
Port-hand lateral mark
Red · can-shaped · keep to port when entering
Starboard-hand lateral mark
Green · conical · keep to starboard when entering
Lateral marks also follow a lighting rule worth learning together: a red port-hand mark carries any red light character except Fl(2+1)R, and a green starboard-hand mark carries any green light character except Fl(2+1)G. Those two excluded “group flash 2+1” characters are reserved for preferred-channel/junction marks, so ordinary lateral marks never use them. Set the colour, shape, topmark and light side by side and a lateral mark has nowhere to hide:
Exam focus: about eight in ten lateral-mark questions test “entering harbour, red to port, green to starboard”, but the marks are really lost on the against-the-conventional-direction case — heading seaward from an inner bay, the red can is passed on your starboard side. Ask yourself “am I entering or leaving harbour?” before answering and you lock in the mark.
Cardinal marks: north, south, east and west point to safe water
Cardinal marks are the most demanding type in the image questions, because they rely on black-and-yellow colouring and a double-cone topmark to point out “which side of this mark the safe, navigable water lies”. The topmark and colouring of each of the four have their own patterns, and you can anchor the memory to the direction the cones point. Every cardinal mark is black and yellow, its topmark is two black cones, and its light is always white; the only differences are the direction of the cones, the arrangement of black and yellow, and how the white light flashes:
The flash count is the most reliable clue for identifying a cardinal mark at night, and a clock face makes it stick: East = 3 flashes (3 o’clock), South = 6 flashes plus a long flash (6 o’clock, the long flash warning of extra danger to the south), West = 9 flashes (9 o’clock), and North is a never-ending continuous quick flash. Fix “3, 6+1, 9, continuous” in mind and you can count out the quadrant from the light alone. For example, on a night passage steering 260° true you see a white light flashing 6 times plus a long flash every 10 seconds — a south cardinal mark; safe water lies to its south, so alter to port and keep the buoy on your starboard side.
A handy mnemonic: the north mark’s two cones “point north”, upward; the south mark’s two cones “drop down”, downward; the east mark’s two cones split apart like the circle of a sunrise “in the east” (bases together), and the west mark’s two cones meet like a wine glass (West = Wine glass). When you see a cardinal mark, it means the navigable water lies in that cardinal direction from the mark — for example, with a north cardinal mark the safe water is to its north, so you should pass on the northern side.
North ▲▲
South ▼▼
East bases together
West points together
Isolated danger, safe water and special marks
The remaining three types each have distinctive features, and remembering them together with their topmarks is the least confusing approach:
Isolated danger mark
Black with a red band · topmark of two black spheres
Safe water mark
Red and white vertical stripes · topmark of a single red sphere
Special mark
Yellow · topmark of a yellow cross (X)
Emergency wreck mark
Blue and yellow stripes · yellow cross topmark
An isolated danger mark is placed on or near an isolated danger (such as a submerged rock or a wreck) with navigable water still all around; the moment you see the “two black spheres” topmark you should raise your guard. A safe water mark is the opposite: it indicates safe, navigable water all around, and is common mid-channel or at a harbour entrance; its topmark is a single red sphere and a vessel may pass on either side. As for the special mark, yellow with a yellow cross-shaped topmark, it is used to mark a particular area or facility and has nothing to do with the port or starboard sides of a channel — when you see it, you know “there is a special arrangement here”. Special marks cover a wide range of uses: collecting oceanographic or meteorological data, traffic separation, military exercise areas, submarine cables and outfall pipes, recreational and leisure areas, waste-disposal or dredging sites, no-entry areas and fish-farming areas — eight categories in all.
The three marks also have distinctive light characters that are especially useful at night: an isolated danger mark shows a white group flash Fl(2), easiest to confirm alongside its two-black-sphere topmark; a safe water mark shows a white long flash LFl.10s (one long flash every 10 seconds, though it may also be Iso, Oc or Morse code Mo(A)), a slow rhythm quite unlike the rapid quick-flashes of cardinal marks; and a special mark shows a yellow flash. Note that a special mark’s yellow light is deliberately designed so that it must not be the same as or similar to any white light character — in drizzle a yellow flash can be mistaken for white, so it must be clearly distinct from the white lights of cardinal, safe water and isolated danger marks.
Beyond the five main types, the Marine Department also uses the emergency wreck marking buoy to mark a newly discovered wreck. It has blue and yellow vertical stripes (equal numbers of each), a yellow cross topmark, and an alternating blue-and-yellow flash on a 3-second period (Al.Fl.BuY.3s). Blue barely appears on any other buoy, so an alternating blue-yellow flash tells you at once “there is a fresh wreck nearby and the water may be dangerous”. Gather all seven types — their colour, topmark and light — into one table and a pre-exam glance slots every one into place:
A three-step method for buoyage questions
When you see a buoy image on the exam paper, do not rush to recall the answer from the colour alone. A fixed three-step routine reduces port/starboard flips and cardinal-mark misreadings:
Look at the topmark and colouring first: a can or cone is usually a lateral mark; a double cone is a cardinal mark; two black spheres is an isolated danger mark.
For a lateral mark, judge port/starboard using the entering-harbour direction; for a cardinal mark, ask which side of the mark the safe water lies.
When you see a danger mark, keep a safe distance; when you see a cardinal mark, pass on the safe side it indicates.
You don't have to memorise every light rhythm, but know what it's for
Beyond colour, shape and topmark, real aids to navigation also use different light characters (such as flash rhythms) at night to help with identification. At the beginner PVO stage you may not need to rote-memorise every light character, but you should understand why light characters exist: when a buoy’s outline cannot be made out at night, the aid conveys its identity through the colour of its light and its flash rhythm. When revising, first fix the colour skeleton: white light is common on cardinal, isolated danger and safe water marks; yellow is used for special marks; alternating blue-and-yellow is unique to the emergency wreck mark; and lateral marks keep the “red to port, green to starboard” red and green.
Charts and light lists compress a light character into a short abbreviation, and once you can read it you can work back to the buoy’s identity. Common light-character abbreviations are: F Fixed, Fl Flashing, Fl(2) Group Flashing (two flashes), Oc Occulting, Iso Isophase, LFl Long Flashing, Q Quick Flashing, VQ Very Quick Flashing and Mo(A) Morse code “A”; the colour abbreviations are W white, R red, G green, Bu blue, Y yellow and Or orange. String them together and you have a full description of a light — for example Fl.G.3s9m5M reads as “green flashing, period 3 seconds, elevation 9 metres, range 5 nautical miles”.
Then fill in the details from each question’s explanation.
This point matters for real navigation too. At night, if you can see only a single flash, you cannot judge hastily on colour alone; you should confirm it together with the chart, the direction of the channel, other nearby marks and your own position. The exam simplifies the scenario, but what it is really testing is the same safety mindset.
The buoyage system, lights and collision avoidance all share the same “red to port, green to starboard” language of direction, so the three topics are best revised together. Once you have firmly fixed “Hong Kong = Region A” in mind and then slotted the shape, colour and topmark of each of the five buoy types into place, buoyage questions turn from “rote memory” into “reading the answer from the features”, and become one of your most reliable sources of marks in Part A.
This article is based on the IALA Maritime Buoyage System; Hong Kong uses Region A. For the light characters and details of individual buoys, please refer to the navigational information published by the Marine Department.
Buoyage, lights and collision avoidance are all connected — revise them together:
- Navigation Lights and Day Shapes: Telling Power-Driven Vessels, Sailing Vessels and Vessels at Anchor Apart at Night
- International Collision Regulations: Which Vessel Gives Way When Two Vessels Meet
- The Complete Grade 2 Pleasure Vessel Licence Exam Guide: Part A and Part B Scope and Revision Order
- Back to the home page to learn about the "10-Minute PVO Boat Licence" app
Turn this guide into your next practice
- Choose the part you need to improve: navigation, seamanship and safety in Part A, or marine engineering in Part B.
- Revisit the relevant guide: COLREGs · lights and shapes · buoys · marine engineering。 Explain the distinguishing condition before answering other questions in the app.
- On your next visit, retry mistakes without looking at the explanation. Then use the official Part A and B samples to check the question format and practise timing.
Download the PVO app free to try. Pro content, access period and price are shown in the app store screen. Website and app records are saved separately.